Standard Integration
This is the detailed guide for setting up the Standard Microsoft Integration in Displagent.
Login
First off, open up Displagent, open the left-side nav menu, and go to the Microsoft Integration page.
TIP
When you visit the page, you should automatically have the Standard integration method selected unless you previously setup the Advanced Integration.
You will see a Microsoft User textbox that should indicate you are not currently logged in to Microsoft. To login, please click the Login To Microsoft button.
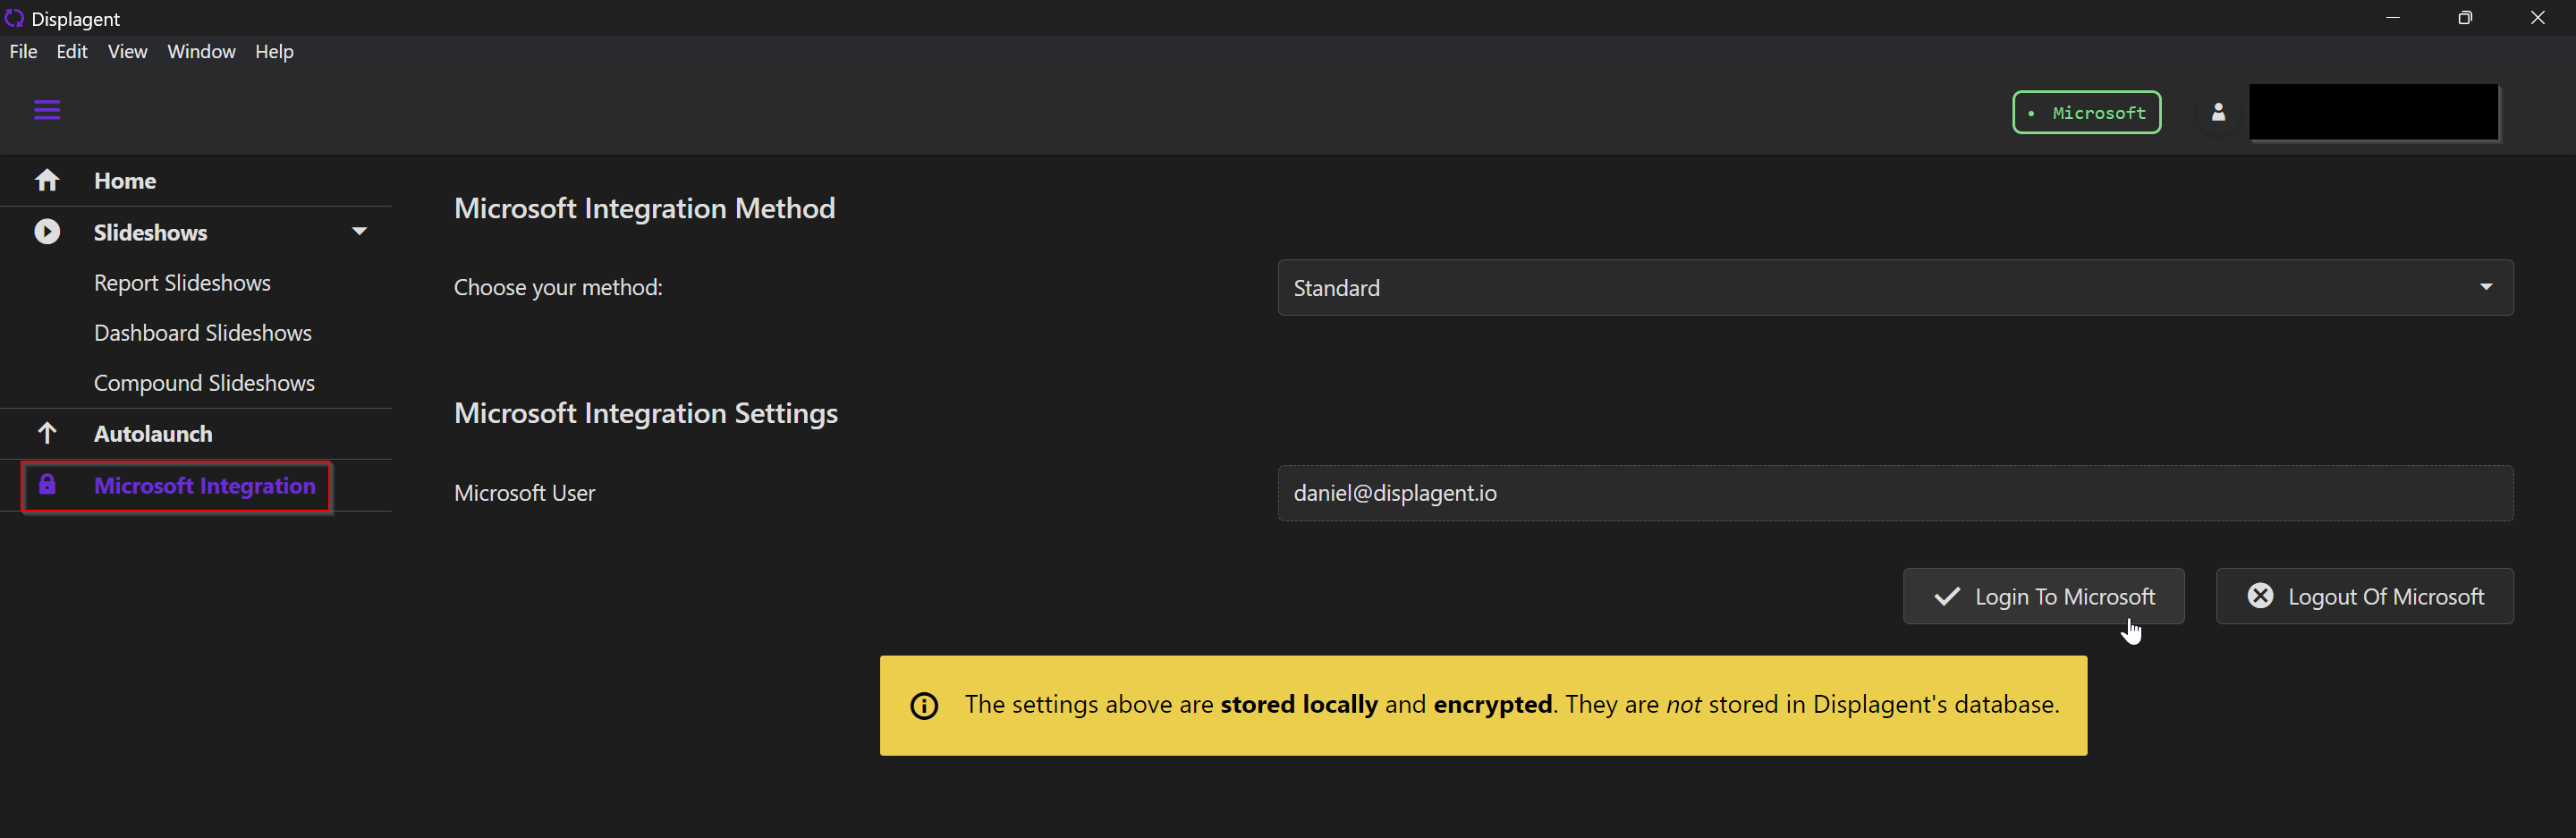
Clicking this button will open up a new tab on your machine's default browser, so please lookout for a new browser tab appearing on your screen. Once the browser tab loads, you will likely see a Microsoft login page. Please proceed with the Microsoft login.
MFA
And yes, multi-factor authentication (MFA) will work just fine here. 😃
Service Account
Please use a Microsoft account with an appropriate Power BI license assigned to it. I would also strongly recommend using a service account so that Displagent's service is not interrupted in case the authenticating employee leaves your company. A service account is not required, but I do recommend using one if you are able.
Grant Consent
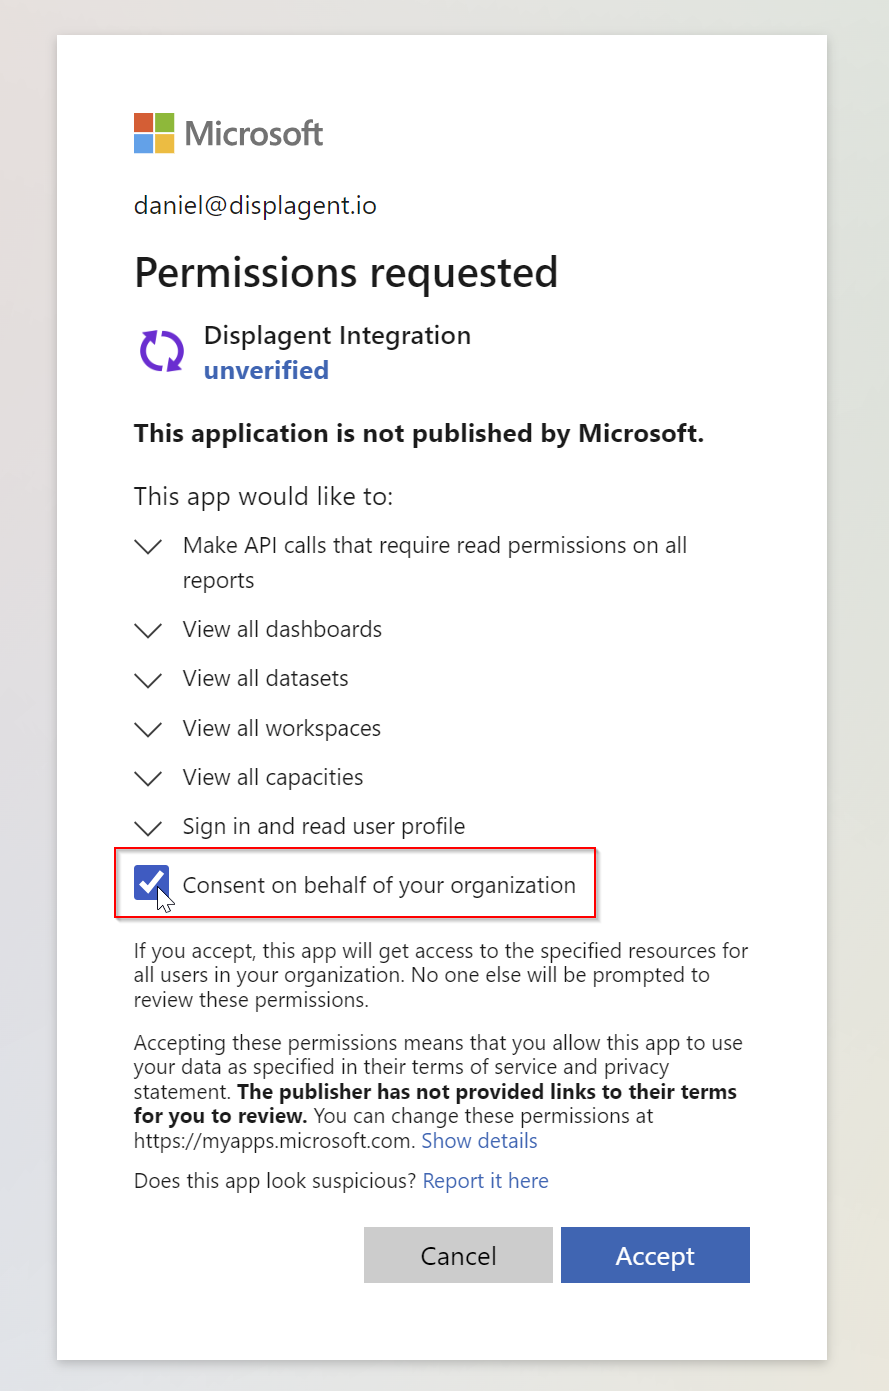
If this is your first time logging into Microsoft with the Standard Integration, then you will likely be met with a consent required dialog box during your Microsoft login process.
The dialog box should list the required permissions for Displagent, and below the permissions will be either:
- A checkbox allowing you to grant
Consent on behalf of your organization, or - A request consent area where you can type a request message to your IT department.
What am I consenting to?
If you or your IT department are wanting to know what permissions Displagent is requesting consent to, just expand the required permissions dropdowns to have a look.
Remember: Displagent only reads the metadata of your Power BI artifacts and embeds them onto a page, it does not write any data to your Power BI tenant.
If you see the Consent on behalf of your organization checkbox, please go ahead and check that box and click the Accept button.
If you need to request consent from your IT department, please type a useful message for them and send the request. I have provided a Microsoft Entra ID Consent Guide for your IT department on the following page in case they need to do the consent process for you.
Successful Login
Once consent has been granted to Displagent by either you or your IT department, then you should be met with a success message after logging into Microsoft. Once you see this message in the browser tab, the authentication process is finished: you can close the browser tab and return to Displagent.
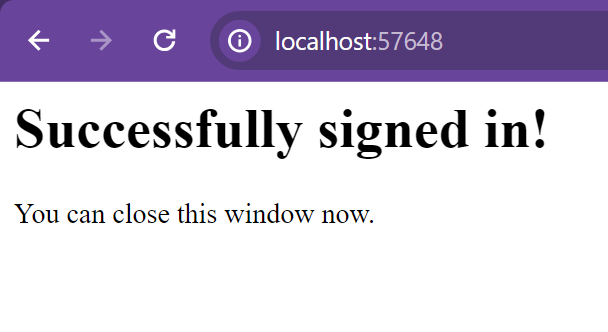
Congratulations, you have integrated with Microsoft successfully! Time to get building!
Power BI Service
Please ensure that your service account has at least View permissions in the Power BI workspaces where your Power BI content resides.
Additionally, if your Power BI content is linked to shared datasets that reside in separate workspaces, please ensure that your service account has at least Read access to those datasets or their encapsulating workspaces in the Power BI service.
My workspace
Any application that uses the Power BI REST API - such as Displagent - is not able to access content from My workspace, and that goes for all users. Please ensure that your Power BI content you wish to display is NOT located in My workspace.
Switching From Advanced
If you are currently using the Advanced Integration, but you want to switch to the Standard Integration, please do the following:
- Go to Help > Delete Advanced Credentials from the Help menu at the top.
- Go back to the Microsoft Integration page and select
Standardfor the method if it is not selected already. - Proceed with the steps mentioned above.